Tailwind CSS is a utility-first CSS framework packed with classes like flex, pt-4, text-center, and rotate-90 that can be composed to build any design, directly in your markup.
CxJS is a JavaScript framework designed for building large single-page applications such as administration consoles and dashboards. CxJS can be easily combined with CSS frameworks such as Bootstrap or Tailwind CSS as all CSS classes generated by the framework are prefixed.
This post is about Tailwind CSS and how it nicely complements CxJS.
There are many benefits that Tailwind CSS brings. For me, number one is the productivity gain achieved by not having to come up with names for CSS classes and separately edit .css and .js files.
Large projects have too many files already, and CSS always feels disconnected from the rest of the code.
The same question always pops up — where should CSS files be located? Should they be at a completely separate location or colocated with the application components?
How do you find a CSS class in a large project and how can you be sure that making a small change will not break things somewhere else?
With Tailwind CSS, you don’t have to come up with names for CSS classes, in most cases, you don’t even need to write any CSS at all. You simply apply bits and pieces from an extremely large pool of predefined utility classes.
This philosophy is very similar to CxJS. CxJS offers a large set of ready-to-use JavaScript components, such as widgets and charts, which are glued together using application-level utilities for state management, routing, push-state navigation, form validation, localization, etc. Everything is there, you just combine bits and pieces.
In CxJS, you are encouraged not to give names to routes and controllers.
Why? Simply, in large-scale applications dealing with so many names becomes extremely tedious. Not having names makes things easier to refactor and move from one place to another.
Let’s go now into some practical pieces.
To make things easier for fellow CxJS developers, we built a sample Demo application with source code available on GitHub. The application has the tooling preconfigured, so it’s a good starting point if you wish to play with CxJS and Tailwind CSS together.
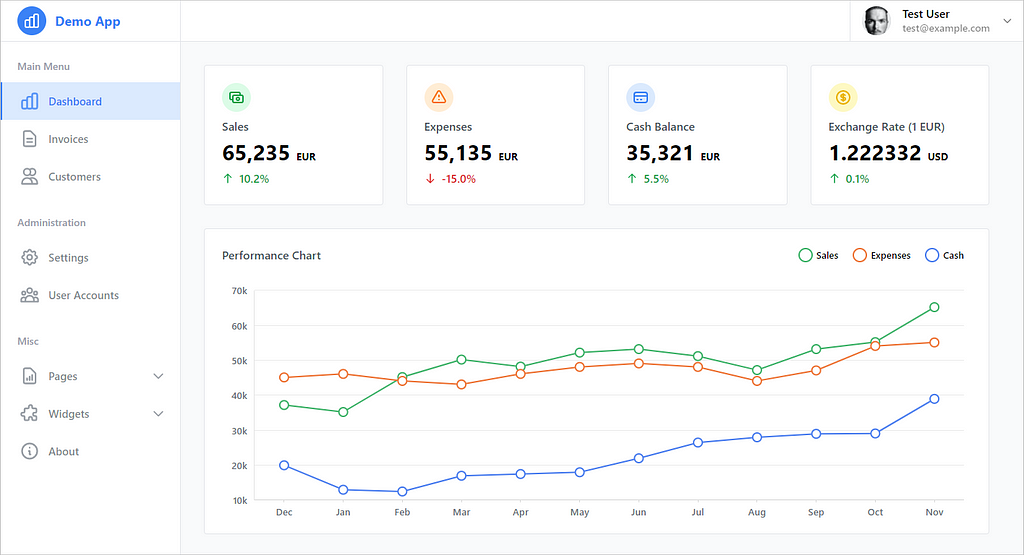
Full disclosure, the inspiration for the layout and the dashboard page came from this amazing Dribbble.
Let’s start with an example of the navigation menu. The most interesting part is how navigation items are implemented. Items are links pointing to various application parts. Each item is visually represented with an icon and text.
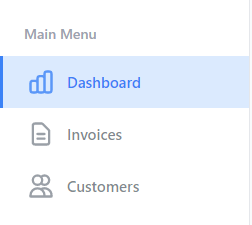
If the browser’s URL matches the href attribute, the item is in the active state and changes appearance. Besides that, nav items can have small badges and allow expanding/collapsing. These functionalities are implemented in the component below.
You can see here Tailwind CSS at work. The class attribute is strikingly long. It cannot fit the screen and that’s very common. People sometimes get scared, but that is actually an advantage as it’s easy to learn about the appearance of the component without leaving the file.
The nav item is implemented using the flex layout, the text is gray and semi-bold, the background changes to light gray color on hover and there is a left border of 3px that is initially transparent.
When active, the item changes its background to light blue, also the left border and text become blue. Similar to the container, you can see how the icon and text are positioned.
It’s all there and in your sight. You are literally seconds away from a new version and the changes you make are immediately applied and presented in the browser.
You’ll notice that active classes start with an exclamation mark. That’s Tailwind’s way of adding the !important modifier which comes really handy here as active classes need to override the default appearance.
Let’s see another example — a dashboard KPI component. This component consists of an icon, a title, a numeric value, and a percentage change indicator.
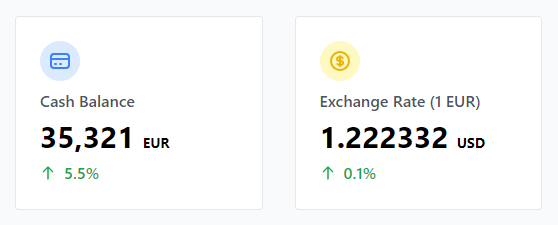
We can see that this is a padded white box with a rounded border. Inside the box, the first element is an icon.
Curiously, it has both class and className properties defined. CxJS supports both and this comes in handy here as the positioning and size of the icon is predefined, and the rest can be passed externally i.e. colors. The title and value parts are pretty straightforward. It’s just positioning, text color, and size.
The change part is interesting. If the change is positive, the text is displayed in green and the icon is pointing up. If the change is negative, the text is displayed in red and the icon is pointing down.
Since the change prop can be a binding, an expression, or a constant value, DataProxy is used to resolve the value and bring it into the store under the alias $change.
With that available, the appearance logic can be easily implemented using expressions and computable values.
CxJS stops with components and Tailwind CSS continues right there. It allows components to be easily arranged into higher-order visual elements such as widgets, sections, toolbars, layouts, etc.
Predefined utilities for margins, colors, shadows, gradients, and other things, are really useful and save precious development time.
On top of that excellent documentation, VS Code extensions, and JIT mode make using Tailwind CSS a great development experience. With all that, it’s easy to conclude that Tailwind CSS is a great companion and complements CxJS really well.
The provided application template can be used as a starting point, as all the tooling has been preconfigured. It can be used for experiments or as a template for new projects. If you wish to try it out, the easiest way to set up a new project is by using CxJS CLI tools.
Stay tuned. There is some exciting news coming soon.