First, let me say that Netlify is an incredibly useful tool.
They provide an all-in-one workflow that combines global deployment, continuous integration, and automatic HTTPS. That makes it a perfect place for hosting CxJS based applications. Let’s see how we can publish a Single Page Application (SPA) on Netlify and configure URL rewriting.
I’ll use the CxJS Starter Kit as an example. The project is is located on GitHub. You can follow the steps using your own project located on GitHub, GitLab or BitBucket or fork Starter Kit and use it as your own project.
Once you sign in you’ll see the list of your sites. Since you are reading this post the list will probably be empty, so just hit New site from Git in the top-right corner.
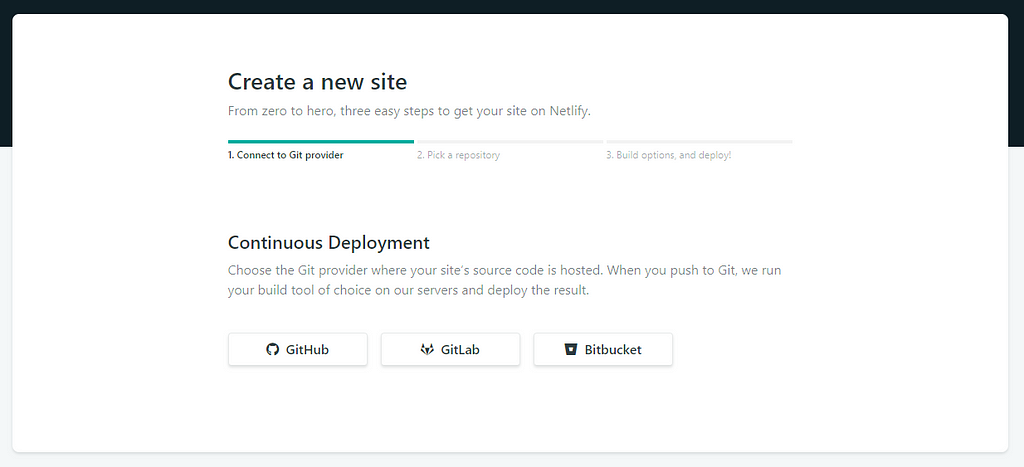
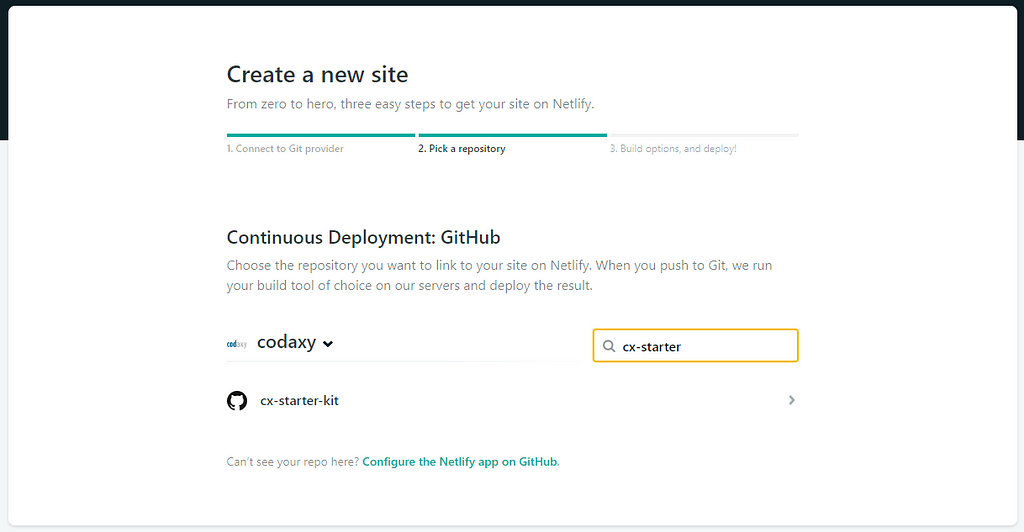
You will be asked to allow Netlify to access your GitHub account. Once you do that you will be able to pick a repository from a list of your repositories retrieved from GitHub.
After selecting the project, let’s configure the build step.
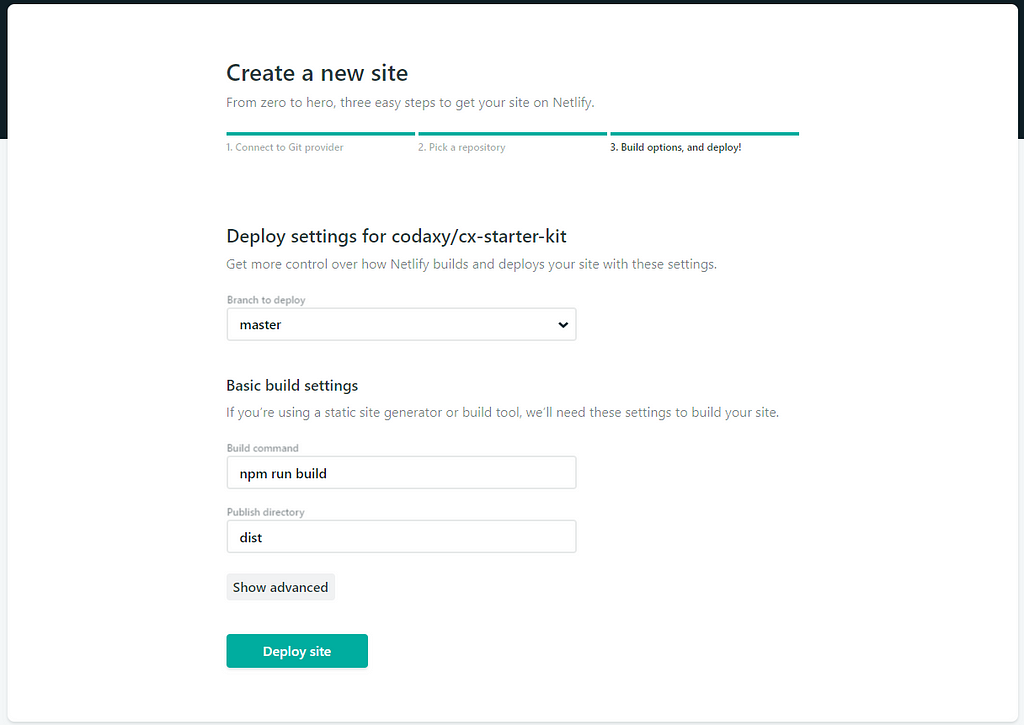
We need to instruct Netlify to build the project using the npm run build command and to publish the contents of the dist folder if the build is successful.
It’s not required to run npm install. Netlify will detect package.json and automatically install NPM packages. Yarn will be used for installing packages if yarn.lock is detected.
That’s almost it. You’ll now see that a new site deployment is in progress.
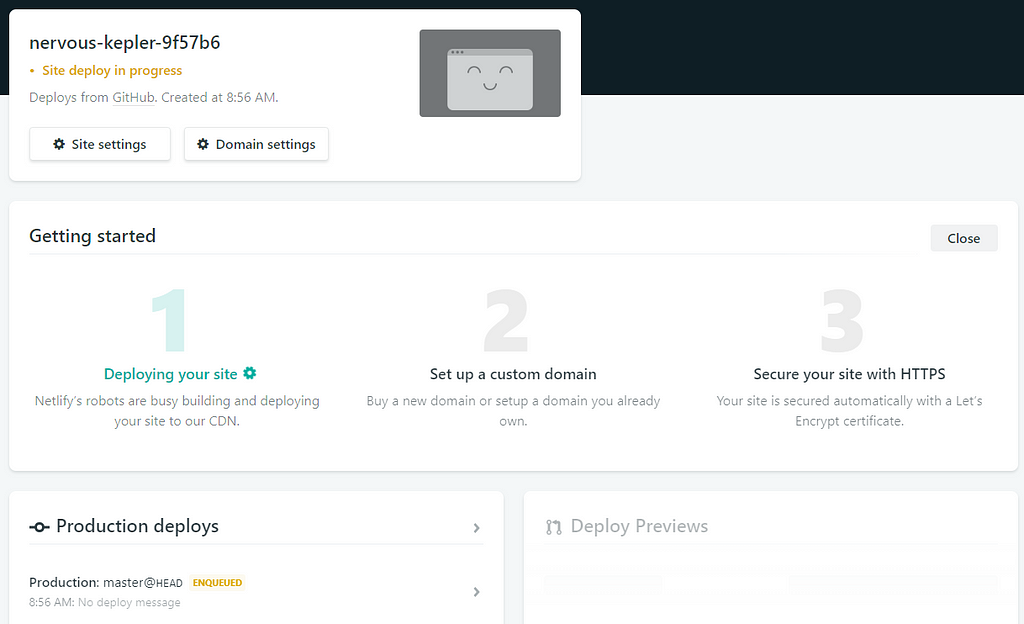
Netlify will assign a random name to your site and deploy it on {name}.netlify.com domain. You can easily change the name in Site settings or configure your own Domain settings.
After approximately one minute, the site is live.
Can it be simpler than that? I don’t think so.
For single-page applications all the routing and content rendering is done client-side. If you try to directly access any other page except the homepage, you’ll encounter an error — 404 — Page not found.
Since the application is handling routing and rendering, the trick is to serve the same content for all URL paths and let the application do its job. This technique is called URL rewriting.
Netlify provides an easy way to configure URL rewriting by putting a file called _redirects alongside other published resources. For our use case, the contents of the file should be just this one line.
/* /index.html 200
In Starter Kit, I created a file called netlify.redirects in the config folder and added the following snippet in webpack’s production configuration (webpack.prod.js).
new CopyWebpackPlugin([{
from: path.resolve(__dirname, './netlify.redirects'),
to: '_redirects',
toType: 'file'
}])
Now everything works as expected.
As you see, it takes less than ten minutes to get your application up and running. Besides that, Netlify provides a myriad of features that are great for testing and production purposes.
In the next post, I’ll explain how to configure webpack and Netlify for optimal long-term caching. Stay tuned.
CxJS allows you to easily build enterprise-grade JavaScript applications. Form widgets, advanced data tables, charts, client-side routing, advanced layouts, beautiful visual themes, and many other features are available in CxJS out of the box. There is no better tool for the job, now completely free for small teams and startups.