This Blog is a result of an internal workshop we organized at our company.
A quick heads-up before you begin: deploying an app to Google Cloud requires you to set up a billing profile in Google Cloud Platform (check the pricing here), though you can try it for free for a limited time. You also need a domain to host your app.
Now that we’ve got that out of the way, you have several options from Google Cloud when it comes to app deployment:
I will describe the way we did it via Virtual Machine.
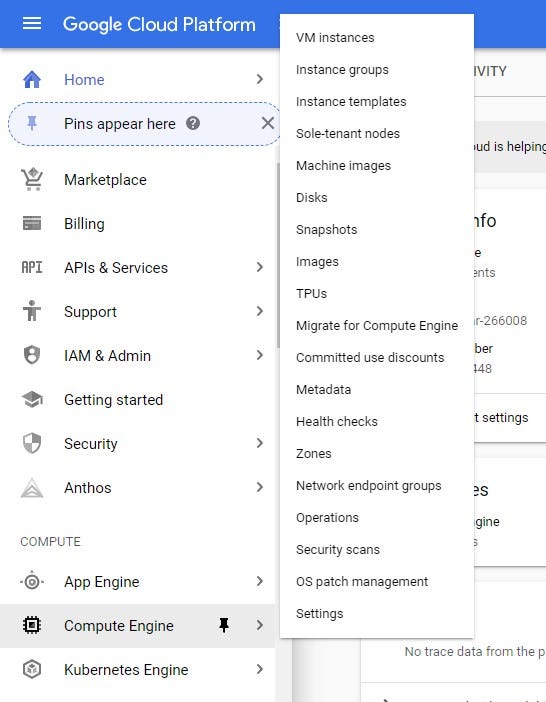
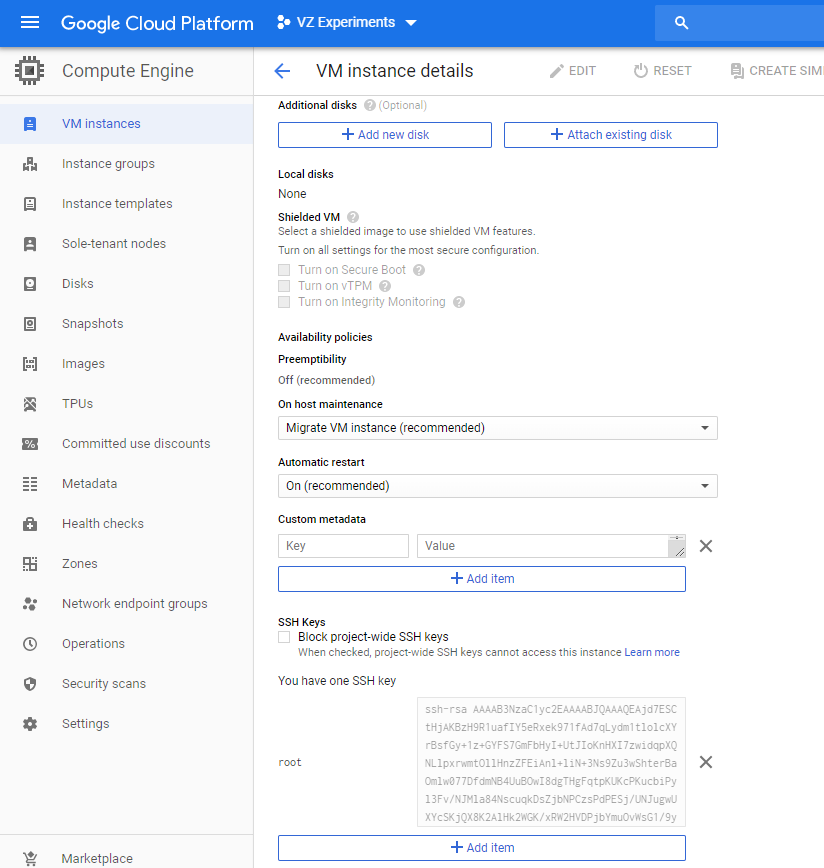
Once you’ve set up the Google Cloud profile head over to https://console.cloud.google.com. From the navigation menu choose Compute Engine, VM Instances, and create your project.
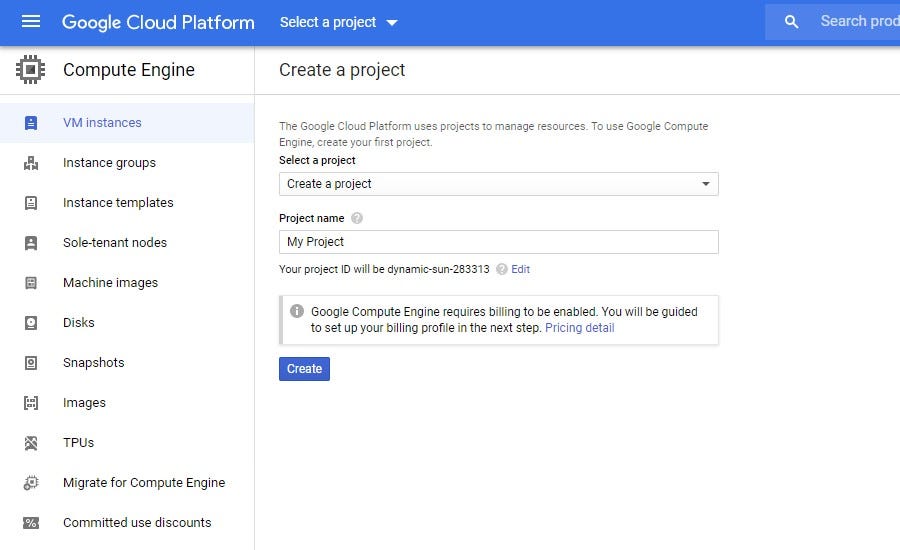
Select create instance and new VM instance and set the following:
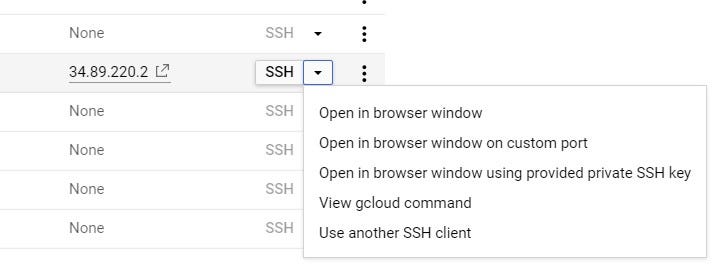
Now your virtual instance is set. Click on SSH to access it and see your username in the shell, or type whoami and it will print out your username.
Now what you need to do is upload your built app to the VM. We used Putty and WinSCP for this.
So open PuTTY Key Generator and generate a key (It uses mouse movements for randomness so you must move the mouse around a bit). Set the username(“key comment” in PuTTY), optionally a password, and save the private key.
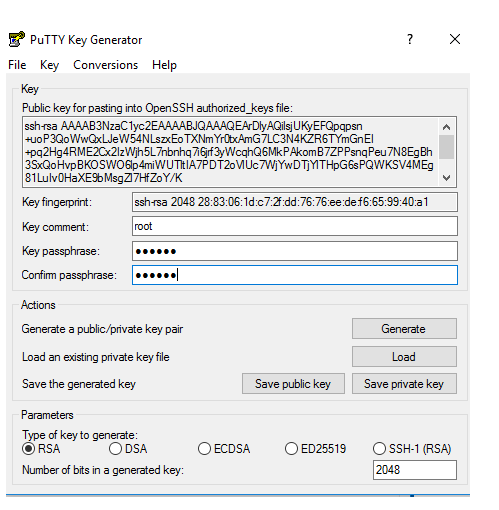
Copy and paste the public key in the VM instance.
Then open WinSCP and enter your hostname and credentials, click on Advanced to add your private key and you’re connected.

Now to the slightly more fun part.
This is done on a development machine and you’ll need Yarn and Node.js to build it. Download those if you don’t already have them. Go ahead and clone the app from https://github.com/codaxy/worldoscope.git.
To check if the app is running enter:
yarn install
yarn start
If node-sass is missing run:
yarn add node-sass
Then build the application:
git checkout feat/master/worldbank-proxy
yarn build
It’s necessary that you checkout to worldbank-proxy, otherwise the API calls won’t work, which is explained later in the text.
The dist folder should now be visible inside the root folder.
Now switch to the VM’s SSH. Install Nginx and configure it to run at the machine’s system startup
sudo yum install nginx
sudo systemctl enable nginx
Drag the dist folder over to the home/vm-instance-name directory in WinSCP.
Create the application folder
sudo mkdir -p /var/www/worldoscope
Though it doesn’t have to be var/www/worldoscope, you can set a different path, e.g. user/share/{name} or something else.
Copy application builds to the newly made folder
sudo cp -R /home/{vm-instance-name}/dist/* /var/www/worldoscope/
And set proper folder ownership
sudo chown -R nginx.nginx /var/www/*
sudo chcon -Rt httpd_sys_content_t /var/www/*
The basic Nginx configuration is placed inside /etc/nginx/nginx.conf file. To edit the file execute:
sudo vim /etc/nginx/nginx.conf
You can use whichever editor suits you.
The basic configuration is shown in the image below
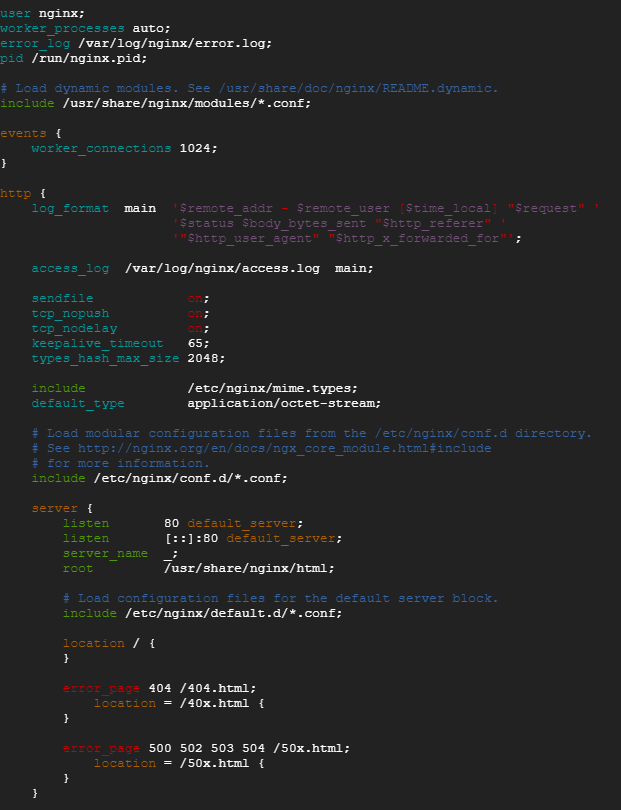
The root directive specifies the root directory used to search for a file. To get the requested file’s path, NGINX appends the request URI to the path specified by the root directive. In the example above, the root directive is defined for a virtual server. The first step is to change the default root location to /var/www/worldoscope.
The try_files directive can be used to check if the specified file or directory exists. NGINX makes an internal redirect if it does, or returns a specified status code if it doesn’t.
The file is specified in the URI form, which is processed using the root or alias directives set in the context of the current location or virtual server. In this case, if the file corresponding to the original URI doesn’t exist, NGINX makes an internal redirect to the URI specified by the last parameter.
Copy this line to the config:
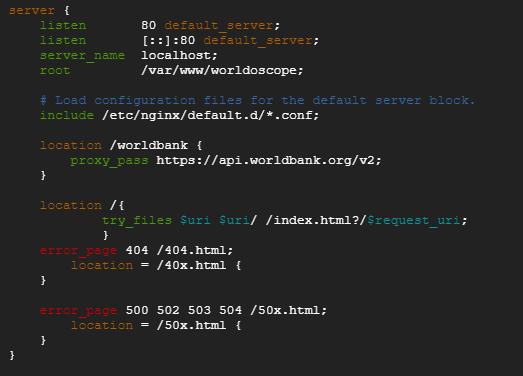
location /{try_files $uri $uri/ /index.html?/$request_uri;}
Proxying is typically used to distribute the load among several servers, seamlessly show content from different websites, or pass requests for processing to application servers over protocols other than HTTP.
To pass a request to an HTTPS proxied server, the proxy_pass directive is specified inside a location. For example, in the Worldoscope application all requests to the worldbank API go to /worlbank. Setting a proxy_pass /worldbank will be resolved to the https://api.worldbank.org/v2.
location /worldbank {proxy_pass https://api.worldbank.org/v2;}
The final configuration should look like this:
And to do that you will use Certbot. Install it on the machine by running
sudo yum install certbot python2-certbot-nginx
Now you can run Certbot in two ways.
It can either create a certificate and we need to manually configure Nginx, by running
sudo certbot certonly --nginx
Or, it creates a certificate, automatically configures Nginx and turns on HTTPS in a single step.
sudo certbot --nginx
For Certbot to complete the setup you will need to define a few of its preset configuration settings, such as the domain name.
If you let Certbot configure Nginx automatically, then the nginx.conf will look like this:
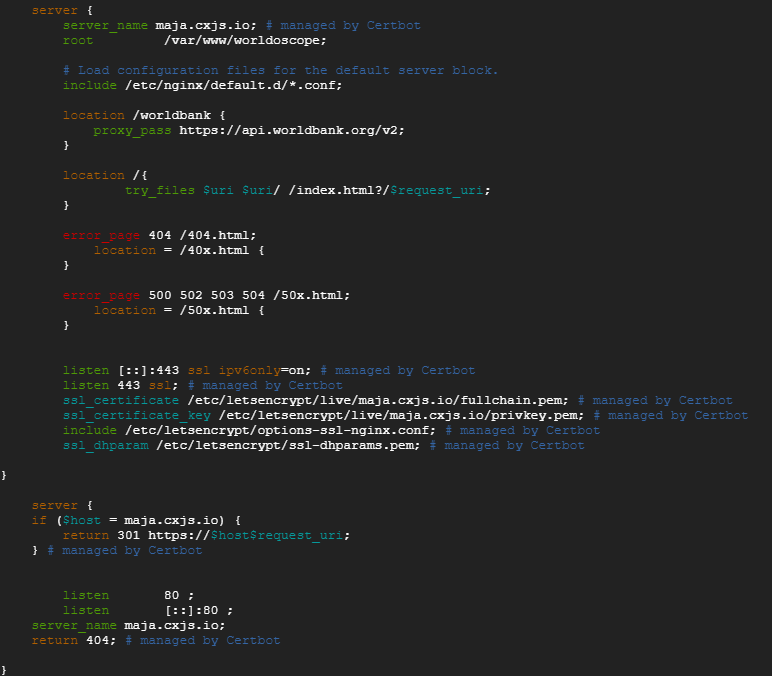
If you run the first command, Certbot will only create a certificate and a key, but you will still need to edit nginx.conf on your own.
Inside the configuration, uncomment the section “Settings for TLS enabled server” and change the predefined locations for the SSL certificate and key.
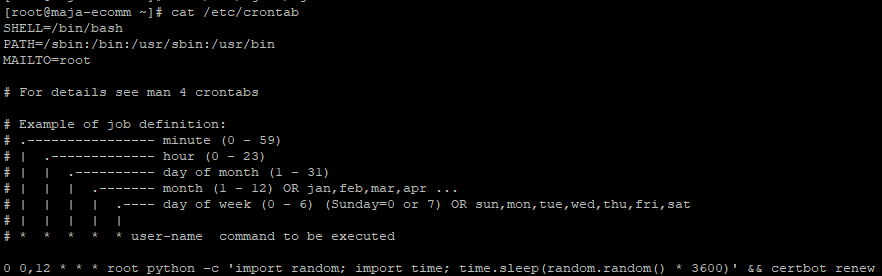
And in order to set up automatic renewal, run
echo "0 0,12 * * _ root python -c 'import random; import time; time.sleep(random.random() _ 3600)' && certbot renew" | sudo tee -a /etc/crontab > /dev/null The command adds a cron job to the default crontab. This crontab configuration file drives cron which is a time-based job scheduler in Unix-like systems.
After running the command your /etc/crontab file will look like this:
This wraps it up. Your Worldoscope app is now live and ready to go!