This post explains first steps required to start creating charts using Cx.
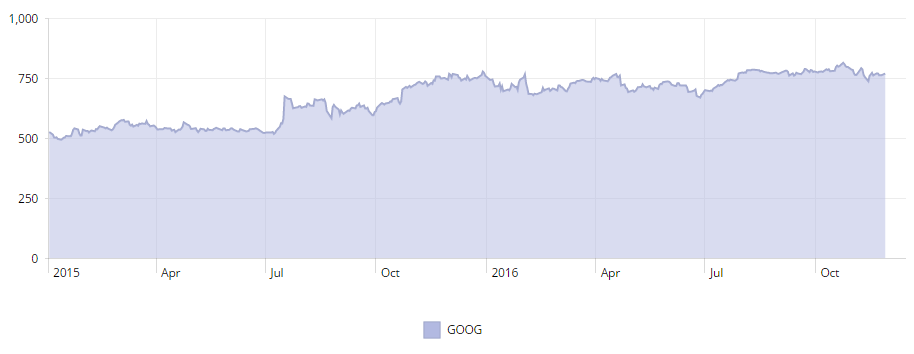
With the help of Yahoo Finance, we’re going to create a chart which presents Google stock price over the last two years.
First, we need some data. a new page dedicated to themes offers historical data and allows CSV file download. CSV file can be easily converted to JSON, which can then be added to the fiddle (Data tab).
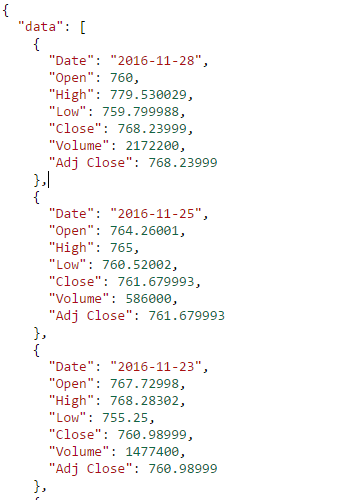
With the data ready, we can start implementing the chart. Check the code snippet below.
//imports omitted
export const App = <cx>
<div>
<Svg style="width:100%;height:300px">
<Chart
margin="10 20 50 50"
axes={{
x: { type: TimeAxis, snapToGrid: 0 },
y: { type: NumericAxis, vertical: true,format: 'currency'}
}}
>
<Gridlines />
<LineGraph
name="GOOG"
data:bind="data"
xField="Date"
yField="Close"
colorIndex="4"
area />
</Chart>
</Svg>
<Legend />
</div>
</cx>
Cx charts are based on SVG, so we start with an Svg element. The Svg is set to full width and 300px height. Inside, there is a Chart element with two axes. TimeAxis is used to map dates to the x axis and NumericAxis is used to map price points to the vertical y axis. The Chart has a margin which leaves enough room for displaying axis labels.
Inside the Chart element, Gridlines are used to render horizontal and vertical gridlines; LineGraph is used to render the graph. xField and yField point to properties inside the data array which hold values for x and y axis. colorIndex and area are additional instructions to make the graph look a little bit nicer.
The Legend widget is used to render chart’s legend by picking up any visible element inside it containing the name attribute. Please note that the Legend is put outside the Svg widget. That’s because Legends are not based on SVG.
That’s all. We have a working chart.. It seems that GOOG price is relatively stable lately.
This is just a tiny bit of what Cx charting package is capable of. For more examples please check out Cx Docs and Cx Starter Kit.